https://www.howtoforge.com/tutorial/microsoft-azure-series-creating-virtual-machine-from-template
Microsoft Azure Cloud computing is a service made by Microsoft for companies and also end-users who’d like to jump into cloud environment quickly and effectively. Azure offers you many services not only virtual machines. There is also networking services, application services, websites, databases, mobile applications and many more.
How to get in touch which Microsoft Azure? If you are a lucky man, maybe your company offers you an MSDN subscription as a benefit. It comes also with 130Eur / month credit for Azure. The second option is to visit Microsoft Azure trial request page (https://azure.microsoft.com/en-us/pricing/free-trial/) where you are given 170Eur credit. This is far enough for one large virtual machine for a month or 4-5 small machines for the same time. Or you can spend it just for one small testing virtual machine (or other service for much longer time).

If you already have any machines (probably not), you can see it listed below in the next “slide”. For creating a new virtual machine, simply click the “+ Add” button in the top menu of the slide. As this slide-style menu in azure portal is pretty annoying, you won’t simply get a list of available images. Therefore you must type the name of the instance you’d like to install. For example, let’s install Ubuntu server now. While you’re typing into the search field, you can see the available instances for your search. There more versions of Ubuntu server, typically the stable one, the latest one and some other instances, even customized like ownCloud preinstalled server based on Ubuntu OS. Let’s choose some of the newest instances, Ubuntu 15.10 for now (version may depend on the time you follow this guide). Now you get a result of your search and you can choose the desired image.
The Basic configuration should show up.
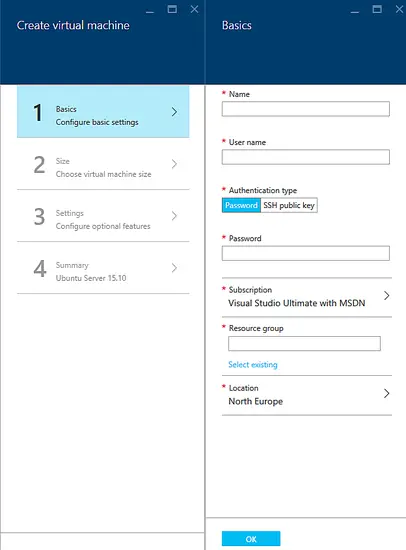
Step 1: Fill in the basic information as Name of the machine (this is not the hostname itself, just a name for you to identify the machine), User name for login, Password or ssh key, Resource group – this is very important as the hostname is going to be the name of resource group and the Microsoft Azure prefix. And the last but not least you can choose the region you wish your machine to be in.
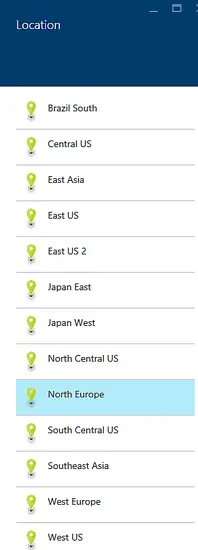
To be honest, the location is somehow based on the registration itself. But I am not sure how. I have available all locations from Brasilia to China, and I have seen people with only Europe region available having the same account preferences as I have.
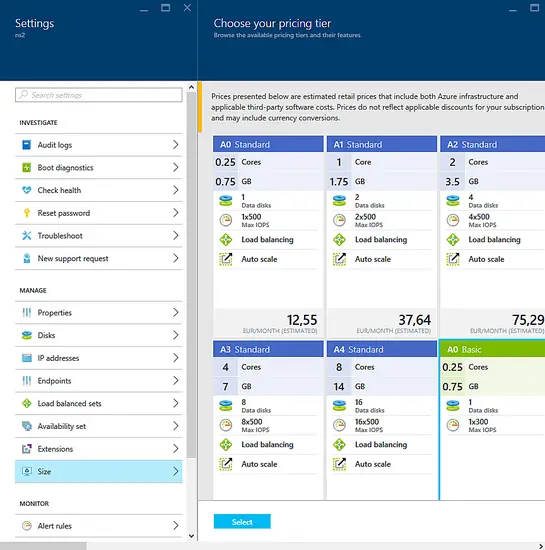
Step 2: The size of your virtual machine. Here you can choose the resources. Notice the Azure offers you recommended virtual machines (probably based on users’ choice). You can always click on “View all” for all available options. Each virtual machine has different parameters, number of cores, memory size, how many physical disks are below your virtual disk, what’s the IOPS limit, SSD size of drive and so on.
The basic difference between basic and standard machines lays in your needs. The basic one is simply the basic. It has almost no additional futures, you can’t scale it or request load balancing. This is the best option for testing. On the other side, if you plan to use the machine in productive environment, use the Standard one for better support and reliability. Each machines has its cost on the bottom. Don’t forget the Azure charges you for all outgoing traffic and IOPS (those charges are really not high, typically few cents or euros per month).
Step 3: Configure optional futures (or future
options). This is something like advanced settings. The nice new feature
is choosing between classic HDD and SSD drive. However, you can use the
SSD drive only with Standard virtual machines. Network options a little
different here in Azure. As all the machines don’t have public IP, you
get just one for your virtual/cloud service. The easiest way to
understand it is imagine it as a router. The cloud service is a NAT
service which holds your public IP and DNS. All your machines are
assigned private IPs. Don’t worry, you can of course redirect all your
needed ports where needed. The last option is monitoring, which I find
not useful for us now. Monitoring keeps an eye on your machine and there
is even an option of auto scale later.
Step4: Summary. Once again, you can review all your settings here. You may now ask what about the hard drive? There is just simple answer. The size of your drive is static and you can’t modify it now. Every image has its own primary disk size. However, you can later add more drivers to your machine and work with them.
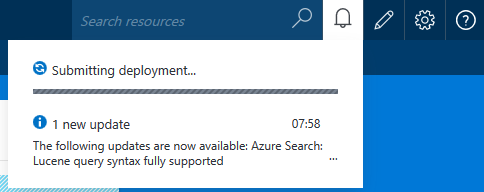
When you are ready to hit the “ok” button, your machine starts to provision. This may take a few minutes and you can check the progress in the notification area.
Once the machine is up and running, you can login to it, change the port redirections (aka Endpoints) and set many other features. One nice feature is changing the size of your machine. Even if it’s Basic one, you can stick to Standard or other Basic whenever you want.
Microsoft Azure Cloud computing is a service made by Microsoft for companies and also end-users who’d like to jump into cloud environment quickly and effectively. Azure offers you many services not only virtual machines. There is also networking services, application services, websites, databases, mobile applications and many more.
How to get in touch which Microsoft Azure? If you are a lucky man, maybe your company offers you an MSDN subscription as a benefit. It comes also with 130Eur / month credit for Azure. The second option is to visit Microsoft Azure trial request page (https://azure.microsoft.com/en-us/pricing/free-trial/) where you are given 170Eur credit. This is far enough for one large virtual machine for a month or 4-5 small machines for the same time. Or you can spend it just for one small testing virtual machine (or other service for much longer time).
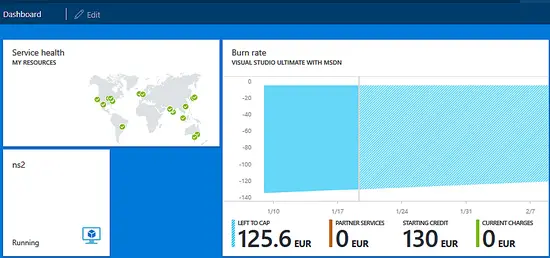
Introduction and your first login
As Azure portal has nice tutorial itself, there is no need to provide much information here. After your first login, you get redirected to the dashboard where you can see your actual credit, running services and their status. The portal is really well scalable and customizable (similar to metro style in windows).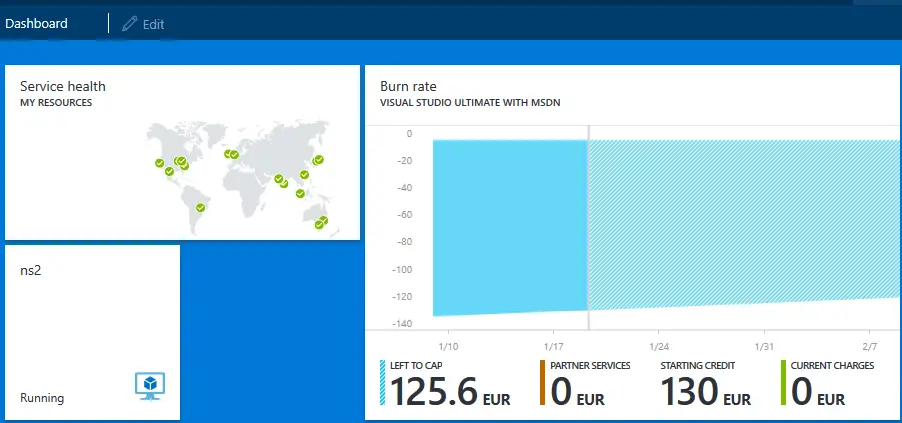
Your very first virtual machine
In time of this tutorial creation (1/19/2016 of intergalactic time), there are two options for virtual machines in Azure portal. As you can see in the picture below, there is Virtual machines (classic) and the non-classic option. After further investigation, the non-classic one is on-premise computing, something we don’t want now. So, let’s click on the Virtual machines (classic) option in our menu.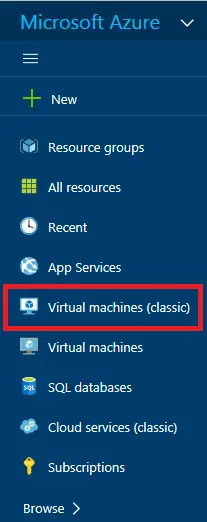
If you already have any machines (probably not), you can see it listed below in the next “slide”. For creating a new virtual machine, simply click the “+ Add” button in the top menu of the slide. As this slide-style menu in azure portal is pretty annoying, you won’t simply get a list of available images. Therefore you must type the name of the instance you’d like to install. For example, let’s install Ubuntu server now. While you’re typing into the search field, you can see the available instances for your search. There more versions of Ubuntu server, typically the stable one, the latest one and some other instances, even customized like ownCloud preinstalled server based on Ubuntu OS. Let’s choose some of the newest instances, Ubuntu 15.10 for now (version may depend on the time you follow this guide). Now you get a result of your search and you can choose the desired image.
The Basic configuration should show up.
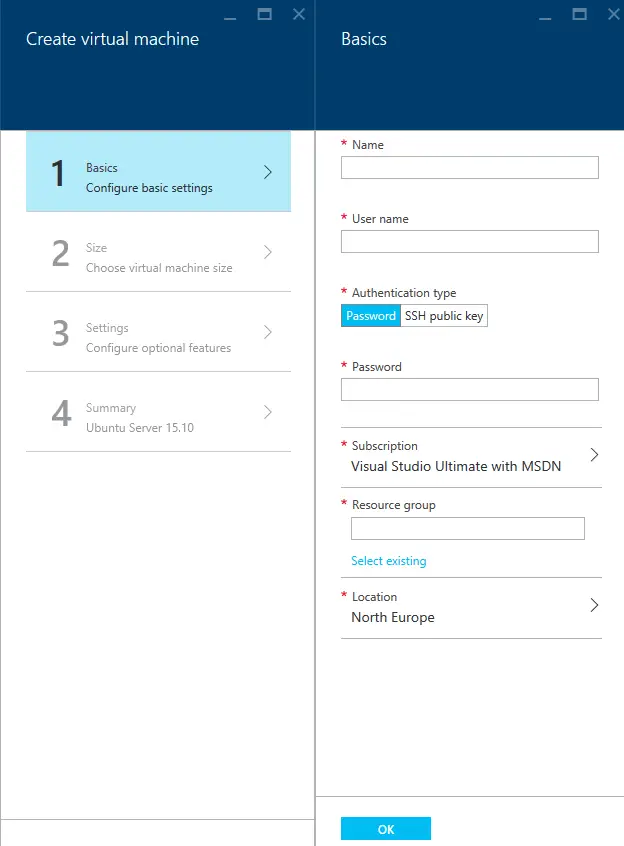
Step 1: Fill in the basic information as Name of the machine (this is not the hostname itself, just a name for you to identify the machine), User name for login, Password or ssh key, Resource group – this is very important as the hostname is going to be the name of resource group and the Microsoft Azure prefix. And the last but not least you can choose the region you wish your machine to be in.
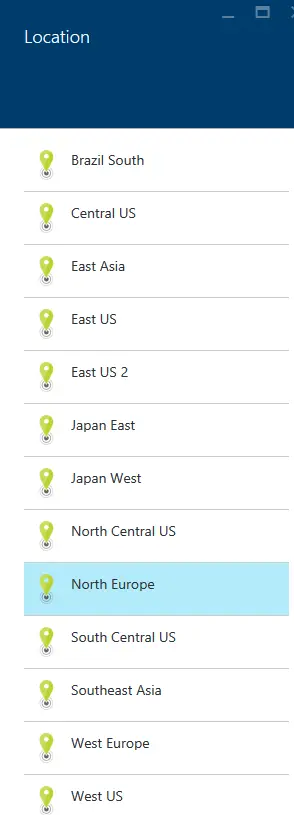
To be honest, the location is somehow based on the registration itself. But I am not sure how. I have available all locations from Brasilia to China, and I have seen people with only Europe region available having the same account preferences as I have.
Step 2: The size of your virtual machine. Here you can choose the resources. Notice the Azure offers you recommended virtual machines (probably based on users’ choice). You can always click on “View all” for all available options. Each virtual machine has different parameters, number of cores, memory size, how many physical disks are below your virtual disk, what’s the IOPS limit, SSD size of drive and so on.
The basic difference between basic and standard machines lays in your needs. The basic one is simply the basic. It has almost no additional futures, you can’t scale it or request load balancing. This is the best option for testing. On the other side, if you plan to use the machine in productive environment, use the Standard one for better support and reliability. Each machines has its cost on the bottom. Don’t forget the Azure charges you for all outgoing traffic and IOPS (those charges are really not high, typically few cents or euros per month).
Step4: Summary. Once again, you can review all your settings here. You may now ask what about the hard drive? There is just simple answer. The size of your drive is static and you can’t modify it now. Every image has its own primary disk size. However, you can later add more drivers to your machine and work with them.
When you are ready to hit the “ok” button, your machine starts to provision. This may take a few minutes and you can check the progress in the notification area.

Once the machine is up and running, you can login to it, change the port redirections (aka Endpoints) and set many other features. One nice feature is changing the size of your machine. Even if it’s Basic one, you can stick to Standard or other Basic whenever you want.


No comments:
Post a Comment