http://xmodulo.com/2013/12/develop-cross-platform-mobile-apps-linux.html
The last few years have witnessed dramatic growth of the mobile market, mostly driven by a large selection of applications. As consumers, we all hate to see some kind of market monopoly by any one platform. The more competition, the more innovation. As developers, we have mixed feelings about cross-platform development. Cross-platform development has several cons; poor platform integration, inflexible design, etc. On the other hand, we can reach a wider market with more consumers, and can offer uniform look and feel for our app across various platforms.
Today, almost all modern mobile platforms provide object-oriented APIs. Thus there is no reason not to build multi-platform apps. In this tutorial, we will walk you through the basics of cross-platform development. As a cross-platform SDK, we will use Titanium SDK from Appcelerator.
For people who are good at Java and HTML, Titanium is a good start in mobile development. To develop Android apps, you will need Android SDK and for iOS apps, Mac. Lucky for us, once you have a code, you can import it into Titanium on Mac, and compile it for iOS.
For Titanium SDK to work properly, we will need:

When Titanium finishes downloading, go to download directory and extract it to /opt.
On Ubuntu or Debian, we will use apt-get:

Log in with your user account created during downloading Titanium SDK, and navigate it to your build directory.
Titanium SDK's work window is connected to your account created
earlier. It provides rich information and a lot of help. On the left
side, we can choose between creating a new project or importing an old
project. For this tutorial, we will make a new project, so select
"Create Project" tab.

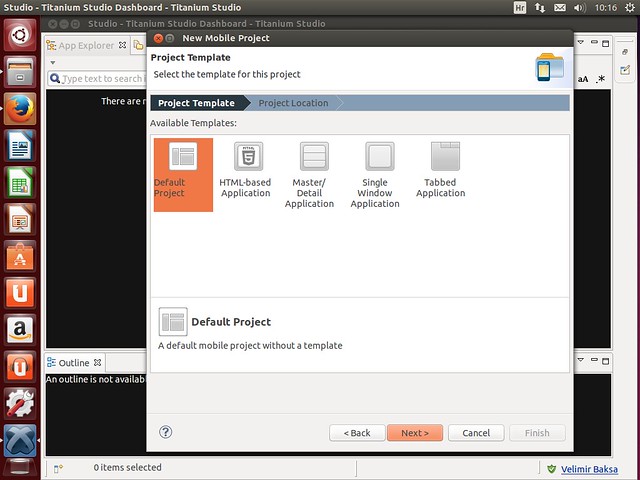
In a new project window, we can choose among multiple templates. For this tutorial, we will choose a default project template.
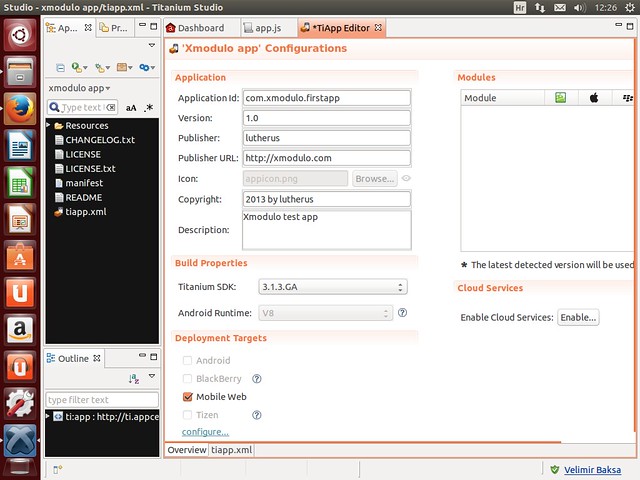
After this, we have to name the project. Put in app id and company URL. App id is inverse from company URL and ends with .appname. Our site URL is http://xmodulo.com, and our app is named "firstapp". That makes our app id "com.xmodulo.firstapp".

With the named project, we need to select Android components. I usually select all of them.
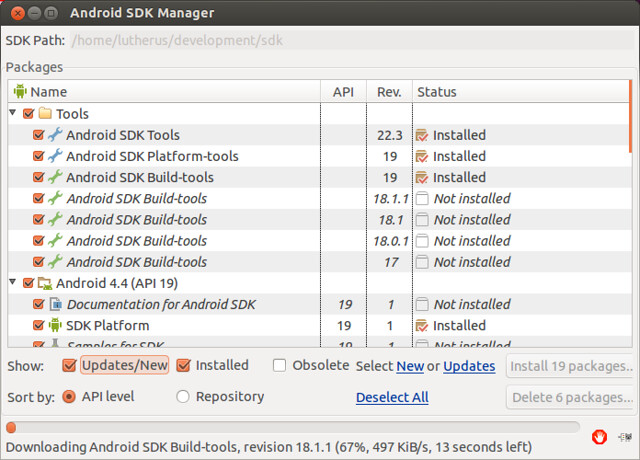
Titanium will download and configure all needed components, as well as update old ones. After downloading and installing Android components, Titanium will automatically open a working window for our project.
A work window consists of two tabs: app.js and app editor. App.js is for coding, and app editor window is used to provide app information.
With Titanium set up, let us create some simple code in app.js window to learn Titanium's basic elements.
The most important element in Titanium is a window element. Windows are nothing complicated. You can think of a window as a container of your work. For a particular application, you can add one or more windows. The next important element is a view element which is a rectangle that can hold other elements, like tag in HTML. Also important elements are tag groups and tags. How do they work? Each tag group holds one or more tags, and each tag controls windows.
For colors we don't use names as they are in hexa-decimal RGB code.
And now using the function Titanium.UI.createWindow, we can create our first windows, and elaborate a little.
What does this code mean? It says that we pass to the createWindows function an argument with all properties. The logic behind those elements is simple.
The tagGroup is the application's root, and cannot be included in some other elements. It holds the tabs and each tab holds its own windows. Let us bring all that together, and build a simple app that demonstrates windows, tabs, and views.
Now let us create some windows and tabs.
With that, let us connect it all together into one.
After having written our code, we need to define its look. For that
we will use a label element. With the label element, we can add a
background wallpaper for our app, define native font and colors. Also,
it allows defining the look of other elements. For our app, we will
define the look of window elements. Let us make a simple label element
for our app.
And how does the source code look together?
And this is what our simple app looks like when run in Android emulator.

This code is small and simple, but is a very good way to begin cross-platform development.
The last few years have witnessed dramatic growth of the mobile market, mostly driven by a large selection of applications. As consumers, we all hate to see some kind of market monopoly by any one platform. The more competition, the more innovation. As developers, we have mixed feelings about cross-platform development. Cross-platform development has several cons; poor platform integration, inflexible design, etc. On the other hand, we can reach a wider market with more consumers, and can offer uniform look and feel for our app across various platforms.
Today, almost all modern mobile platforms provide object-oriented APIs. Thus there is no reason not to build multi-platform apps. In this tutorial, we will walk you through the basics of cross-platform development. As a cross-platform SDK, we will use Titanium SDK from Appcelerator.
What do we need?
- Understanding of Java
- PC
- Android SDK
- Titanium SDK
For people who are good at Java and HTML, Titanium is a good start in mobile development. To develop Android apps, you will need Android SDK and for iOS apps, Mac. Lucky for us, once you have a code, you can import it into Titanium on Mac, and compile it for iOS.
For Titanium SDK to work properly, we will need:
- Oracle Java JDK 6 or 7
- Node.js
- Android SDK and Android NDK
- At least 2 Gb of RAM
When Titanium finishes downloading, go to download directory and extract it to /opt.
$ sudo unzip titanium.linux.gtk.x86_64.zip -d /opt
Next go to terminal, and set path.
$ echo 'export MOZILLA_FIVE_HOME=/usr/lib/mozilla' >> ~/.bashrc
$ source ~/.bashrc
Next we have to install all dependencies for Titanium SDK.$ source ~/.bashrc
On Ubuntu or Debian, we will use apt-get:
$ sudo apt-get install libjpeg62 libwebkitgtk-1.0-0 lib32z1 lib32ncurses5 lib32bz2-1.0
On Fedora, use yum:
$ sudo yum install libjpeg62 libwebkitgtk-1.0-0 lib32z1 lib32ncurses5 lib32bz2-1.0
After installing dependencies, we have to relocate Titanium as follows.
$ sudo ln -s /opt/Titanium_Studio/TitaniumStudio /usr/local/bin/TitaniumStudio
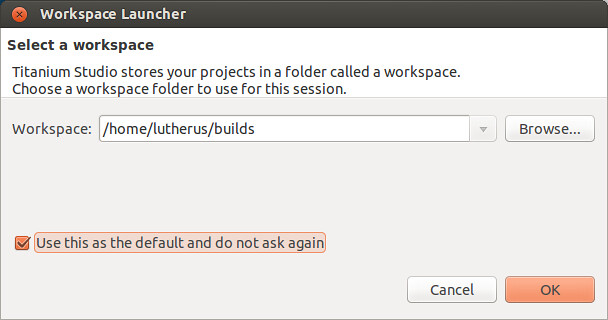
Before we run Titanium SDK for the first time, we have to make a
build directory for Titanium. Usually I have in my /home directory a
folder named "builds" with sub folders for all my projects. Let us make a
build directory.
$ mkdir ~/builds
With a build directory created, launch Titanium.
$ TitaniumStudio
Log in with your user account created during downloading Titanium SDK, and navigate it to your build directory.
In a new project window, we can choose among multiple templates. For this tutorial, we will choose a default project template.
After this, we have to name the project. Put in app id and company URL. App id is inverse from company URL and ends with .appname. Our site URL is http://xmodulo.com, and our app is named "firstapp". That makes our app id "com.xmodulo.firstapp".
With the named project, we need to select Android components. I usually select all of them.
Titanium will download and configure all needed components, as well as update old ones. After downloading and installing Android components, Titanium will automatically open a working window for our project.
A work window consists of two tabs: app.js and app editor. App.js is for coding, and app editor window is used to provide app information.
With Titanium set up, let us create some simple code in app.js window to learn Titanium's basic elements.
The most important element in Titanium is a window element. Windows are nothing complicated. You can think of a window as a container of your work. For a particular application, you can add one or more windows. The next important element is a view element which is a rectangle that can hold other elements, like tag in HTML. Also important elements are tag groups and tags. How do they work? Each tag group holds one or more tags, and each tag controls windows.
Simple app build
In this part of the tutorial, we will build a simple app with only main elements. First, let us specify some basic things, like pixels. Pixel sizes are not in standard px notation, but in percentage, and are required to be written as string.
1
2
3
4
| ...top,20,width:"50%"... |
1
2
3
4
| ... backgroundColor:"#f00", borderColor:"#87C8FF" ... |
1
2
3
4
| var win1 = Titanium.UI.createWindow({ title:'Tab 1', backgroundColor:'#fff' }); |
The tagGroup is the application's root, and cannot be included in some other elements. It holds the tabs and each tab holds its own windows. Let us bring all that together, and build a simple app that demonstrates windows, tabs, and views.
1
2
| // create tab group var tabGroup = Titanium.UI.createTabGroup(); |
1
2
3
4
5
6
7
8
9
10
11
12
13
14
15
16
17
18
19
20
21
22
23
| // create base UI tabs and windows var win1 = Titanium.UI.createWindow({ title:'I am Window 1.', backgroundColor:'#fff' }); var tab1 = Titanium.UI.createTab({ icon:'KS_nav_views.png', title:'Tab 1', window:win1 }); var win2 = Titanium.UI.createWindow({ title:'I am Window 2', backgroundColor:'#fff' }); var tab2 = Titanium.UI.createTab({ icon:'KS_nav_views.png', title:'Tab 2', window:win2 }); |
1
2
3
4
5
6
| // add tab tabGroup.addTab(tab1); tabGroup.addTab(tab2);// open tab group tabGroup.open(); |
1
2
3
4
5
6
7
| var label1 = Titanium.UI.createLabel({ color:'#999', text:'I am Window 1', font:{fontSize:20,fontFamily:'Helvetica Neue'}, textAlign:'center', width:'auto' }); |
1
2
3
4
5
6
7
8
9
10
11
12
13
14
15
16
17
18
19
20
21
22
23
24
25
26
27
28
29
30
31
32
33
34
35
36
37
38
39
40
41
42
43
44
45
46
47
48
49
50
51
52
53
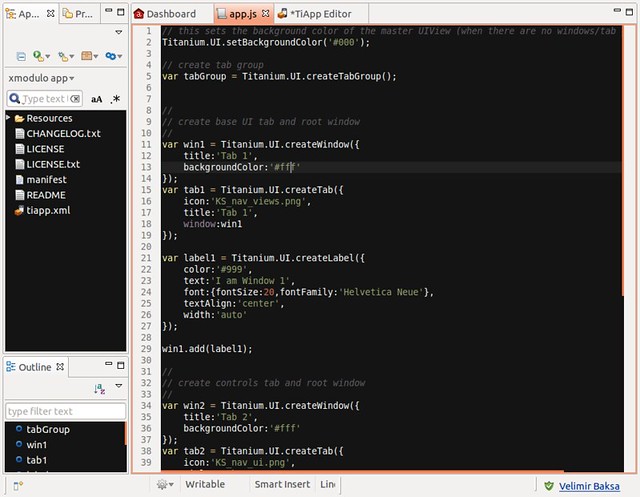
| // create tab groupvar tabGroup = Titanium.UI.createTabGroup(); // create base UI tabs and root windows var win1 = Titanium.UI.createWindow({ title:'Tab 1', backgroundColor:'#fff' }); var tab1 = Titanium.UI.createTab({ icon:'KS_nav_views.png', title:'Tab 1', window:win1 }); var label1 = Titanium.UI.createLabel({ color:'#999', text:'I am Window 1', font:{fontSize:20,fontFamily:'Helvetica Neue'}, textAlign:'center', width:'auto' });win1.add(label1);var win2 = Titanium.UI.createWindow({ title:'Tab 2', backgroundColor:'#fff' }); var tab2 = Titanium.UI.createTab({ icon:'KS_nav_views.png', title:'Tab 2', window:win2 });var label2 = Titanium.UI.createLabel({ color:'#999', text:'I am Window 2', font:{fontSize:20,fontFamily:'Helvetica Neue'}, textAlign:'center', width:'auto' });win2.add(label2);// add tab tabGroup.addTab(tab1);tabGroup.addTab(tab2); // open tab group tabGroup.open(); |
And this is what our simple app looks like when run in Android emulator.
This code is small and simple, but is a very good way to begin cross-platform development.

After testing mobile cross-platform dev. tools, the best way is to develop mobile applications through the use of the platform provided sdk and tools. Only the time and complexity of the application proofs that the time spent on adjusting the UI on every platform (and ends with forking editions, one for every platform), is better invested in learning the platform provided tools.
ReplyDelete